










You pasted the proxy details into your Mac, hit OK, and opened a browser. Your real IP stared back at you.
Annoying, right? The settings looked correct. The proxy works fine on your other machine. So what went wrong?
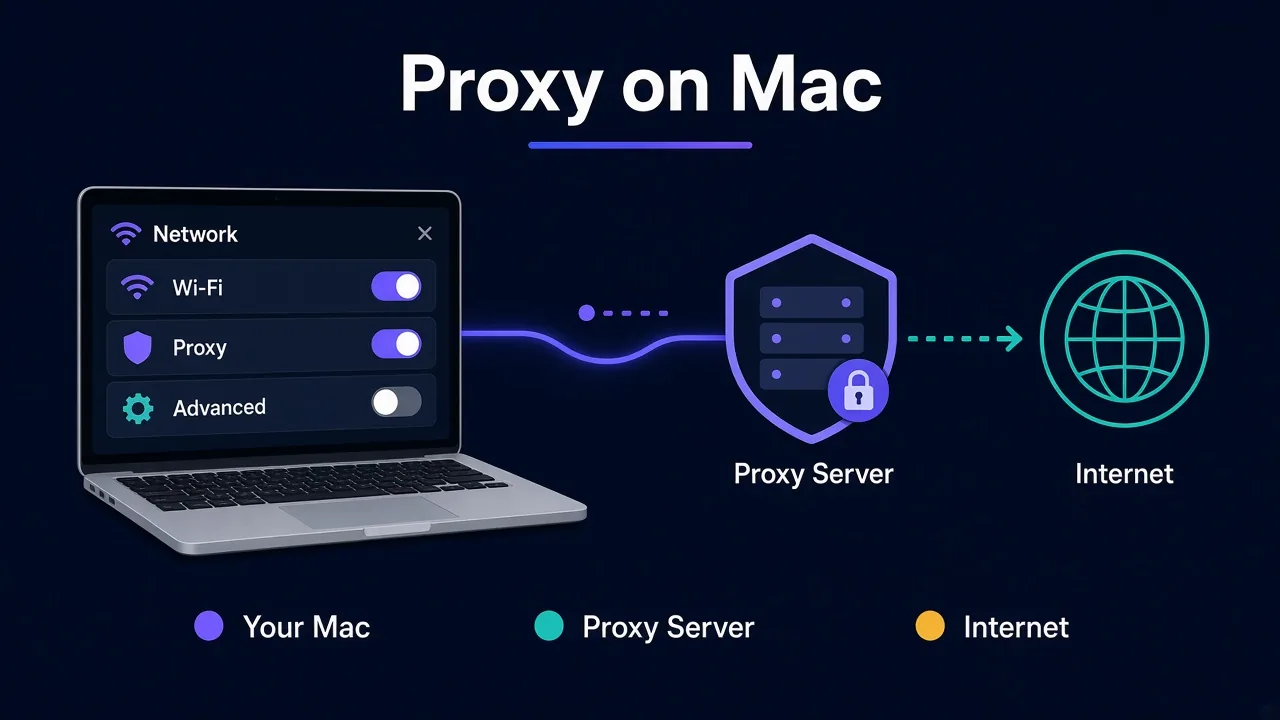
Here's the good news. Setting up a proxy on a Mac takes about five minutes in System Settings, and you don't need any extra software. The catch is that macOS ties proxy settings to one network connection at a time, and plenty of apps quietly ignore them.
We'll walk through the setup first. Then we'll get to the two reasons most Mac proxies "don't work", because neither one is a typo.
What do you need before you touch any settings?
Grab four things from your proxy provider's dashboard before you start. Having them open in a note saves a lot of back and forth.
- The proxy host, either an IP address or a hostname like
gate.example.com. - The port number, such as 8080 or 1080.
- The protocol: HTTP, HTTPS or SOCKS5.
- Your login details, or confirmation that your own IP is on the provider's allowlist.
That last one matters more than it looks. Some providers check a username and password. Others only accept traffic from IP addresses you've added in the dashboard.
Not sure which one you have? Our guide to username/password vs IP whitelisting explains both and when each one breaks.
You'll also want to know which protocol you're dealing with. If the dashboard offers both HTTP and SOCKS5, read HTTP vs SOCKS5 proxies first. For browsing on a Mac, HTTP and HTTPS are the easiest to get right.
How to set up a proxy on Mac in System Settings
These steps cover macOS Ventura, Sonoma, Sequoia and newer, where Apple replaced System Preferences with System Settings. We cover older versions a little further down.
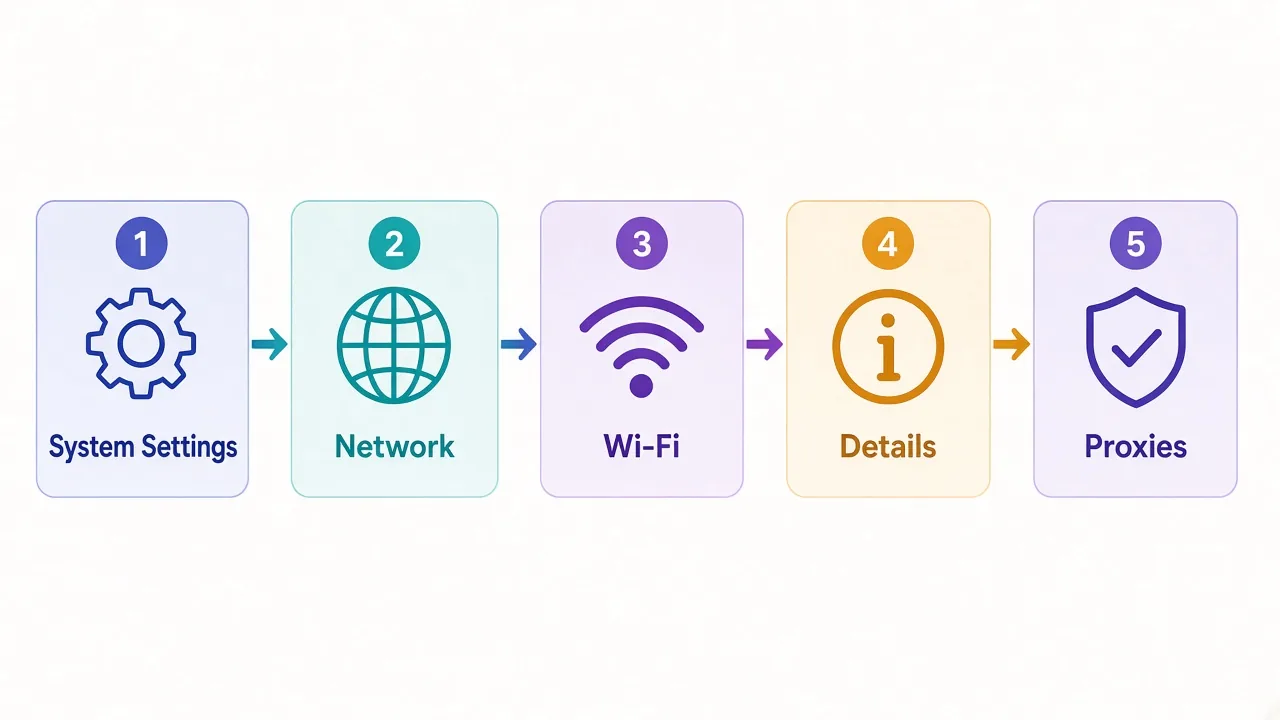
- Open the Apple menu and choose System Settings.
- Click Network in the sidebar.
- Pick the connection you're using right now, usually Wi-Fi or Ethernet.
- For Wi-Fi, click Details next to the network you're connected to. For Ethernet, click Details on the Ethernet pane.
- Choose Proxies from the list on the left of the panel that opens.
- Turn on the proxy type you need and fill in the server and port.
- Click OK to save.
That's the whole flow. Most of the confusion comes from step 6, because the Proxies panel shows a long list of switches with similar names.
Quick tip
You need an administrator account to change network settings. If the fields look greyed out, click the lock or enter your Mac password when asked.
Which proxy switch should you actually turn on?
The Proxies panel lists several options. You'll only use one or two of them.
| Option in macOS | What it does | When to use it |
|---|---|---|
| Auto proxy discovery | Looks for proxy settings your network publishes | Office networks run by an IT team |
| Automatic proxy configuration | Loads rules from a PAC file URL | When your provider or IT team gives you a .pac link |
| Web proxy (HTTP) | Routes plain HTTP traffic | Most paid proxies, turned on together with the next one |
| Secure web proxy (HTTPS) | Routes HTTPS traffic, which is nearly every website today | Always pair it with Web proxy |
| SOCKS proxy | Routes traffic at a lower level, not only web pages | When your provider gives you a SOCKS5 endpoint |
Here's the mistake we see most often. People turn on Web proxy (HTTP) and stop there.
Almost every site you visit runs over HTTPS. If only the HTTP switch is on, those visits skip the proxy entirely. So you check your IP on a secure site and see your own address.
The fix is simple. Turn on both Web proxy and Secure web proxy, and enter the same host and port in each. Most HTTP proxies handle HTTPS traffic on the same port.
Using SOCKS5 instead? Turn on only SOCKS proxy and leave the web ones off. Mixing them makes it hard to tell which one your traffic used.
Where do the username and password go?
Under each proxy type you switch on, macOS shows a Proxy server requires password toggle. Turn it on and enter the username and password from your provider.
macOS saves those credentials in your Keychain, so you won't type them every time. Some apps still pop up their own login box the first time they hit the proxy. That's normal.
If your provider uses IP allowlisting instead, leave the toggle off. Just make sure the public IP of the network you're on is added in their dashboard.
Watch out
An allowlisted IP is tied to one network. Take your MacBook to a café and your home IP no longer applies. The proxy will refuse the connection until you add the new one.
One more quirk. A few apps can use the system proxy but can't handle a password-protected one. If an app keeps failing while Safari works, IP allowlisting is often the easier route for that app.
Remember those "it doesn't work" reasons? Here's the first one
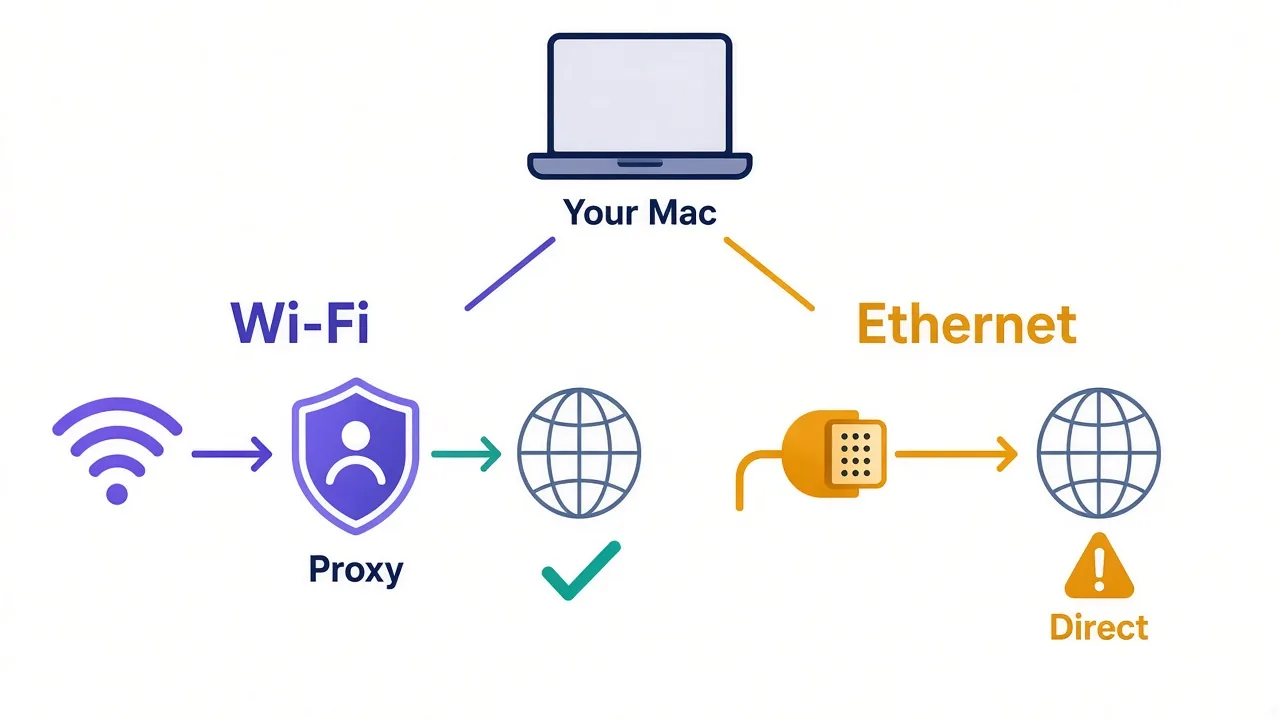
macOS doesn't have one proxy setting for the whole machine. Each network service gets its own.
So the proxy you set on Wi-Fi does nothing when you plug in an Ethernet cable or a USB-C dock. Your Mac switches to the wired connection, which has its own blank Proxies panel, and your traffic goes out directly.
Say you work at a desk with a dock most of the day. You set the proxy on Wi-Fi because that's what showed up first. It "works" on the couch in the evening and "breaks" every morning.
The fix takes a minute. Open System Settings → Network, look at which service has a green dot, and set the proxy on that one too. If you switch between Wi-Fi and a dock, configure both.
Want to swap between proxy and no proxy without retyping anything? Use network Locations.
Click the … menu at the bottom of the Network pane, choose Locations, and create one called "Proxy".
Each Location keeps its own settings, and you can switch between them from the same menu.
What about older Macs on Monterey or earlier?
The settings are the same. They just live in a different place.
- Open System Preferences and click Network.
- Select your active connection in the left column.
- Click Advanced, then the Proxies tab.
- Tick the protocols you need, enter the server and port, and add a password if required.
- Click OK, then Apply.
On these versions, the Locations menu sits at the top of the Network window instead of behind a … button. It does the same job.
Don't skip Apply. On older versions, clicking OK alone closes the sheet without saving the change. It's an easy one to miss.
Can you set a Mac proxy from Terminal instead?
Yes, and it's handy if you set up several Macs or switch proxies often. Apple's built-in networksetup command changes the same settings you see in System Settings.
First, list your network services so you use the exact name:
networksetup -listallnetworkservicesThen set the HTTP and HTTPS proxy for Wi-Fi. Swap in your own host and port:
networksetup -setwebproxy "Wi-Fi" proxy.example.com 8080
networksetup -setsecurewebproxy "Wi-Fi" proxy.example.com 8080
For a SOCKS proxy, the command has an odd name:
networksetup -setsocksfirewallproxy "Wi-Fi" proxy.example.com 1080To check what's set, or to switch it off again:
networksetup -getwebproxy "Wi-Fi"
networksetup -setwebproxystate "Wi-Fi" off
networksetup -setsecurewebproxystate "Wi-Fi" off
You can add a username and password to the end of the set commands too. We'd avoid it. Anything typed there lands in your shell history in plain text.
Which apps ignore your Mac proxy settings?
Now for the second reason a Mac proxy seems broken. Not every app reads the system settings.
Safari and Chrome both use the macOS proxy by default. That's why the steps above are all you need for setting a proxy in Chrome on a Mac.
Firefox is different. It has its own connection settings and can either follow the system or use its own proxy. Our Firefox proxy guide shows where that switch lives.
Terminal is the big one. Command-line tools like curl, git, Homebrew and Python scripts don't read System Settings. They look for environment variables instead:
export HTTP_PROXY="http://user:pass@proxy.example.com:8080"
export HTTPS_PROXY="http://user:pass@proxy.example.com:8080"
Those last only for the current Terminal window. For a full walkthrough with flags and auth, see how to use a proxy with cURL.
Some desktop apps and games bypass the system proxy completely. If you need every app on the Mac routed, a proxy setting isn't the right tool. That's closer to what a VPN does, and proxy vs VPN covers the trade-off.
How do you know the proxy is really working?
Don't trust the settings panel. Trust what a website sees.
- Before turning the proxy on, visit an IP checker and note your IP and location.
- Turn the proxy on and reload the page in a fresh private window.
- Confirm the IP and country now match what you bought.
- In Terminal, run
curl https://api.ipify.orgto see whether command-line traffic goes through too.
If the browser shows the proxy IP but Terminal shows yours, everything's behaving as designed. Terminal just needs the environment variables from the last section.
Our guide on how to check if a proxy is working goes further. It covers DNS and WebRTC leaks, which can still reveal your real location.
Still stuck? The usual suspects, in order
Most Mac proxy problems come down to a short list. Work through it top to bottom.
| Symptom | Likely cause | Fix |
|---|---|---|
| Real IP shows on every site | Proxy set on the wrong network service | Set it on the service with the green dot |
| HTTP sites work, HTTPS sites don't use the proxy | Only Web proxy is on | Turn on Secure web proxy too |
| Pages fail to load at all | Wrong port or protocol | Recheck the dashboard; SOCKS ports often differ |
| Repeated login prompts | Wrong credentials or allowlist mismatch | Reset the password or add your current IP |
| Local devices like printers stop working | Local traffic sent to the proxy | Add *.local and 192.168.0.0/16 to the bypass list |
Pasting the host with http:// in front is another quiet failure. The Server field wants only the hostname or IP, and the port goes in its own box.
That bypass list sits at the bottom of the Proxies panel. Anything you add there connects directly. It's also where you'd put your company's internal sites if the proxy can't reach them.
Good habit
Keep "Exclude simple hostnames" ticked. It stops local names like your router's admin page from being sent through the proxy.
If the proxy connects but sites block you anyway, the setup is fine. The IP type is the problem. Datacenter IPs get flagged fast on big platforms, so check residential vs datacenter proxies before you blame your Mac.
Should you use a system proxy or a per-app setup?
It depends on what you're doing, so here's how we'd decide.
Browsing from a different country, or testing how a site looks elsewhere? The system proxy is perfect. Set it once and Safari and Chrome both follow it.
Running scrapers or scripts? Skip the system setting and configure the proxy inside the script. That way your own browsing stays on your normal connection, and you don't burn paid bandwidth on Slack and software updates.
Managing several accounts on one platform? A single system proxy is the wrong tool, because every account would share one IP.
An antidetect browser that gives each profile its own proxy is the safer setup. Our list of antidetect browsers is a good place to start.
Also think about session type. A login works best on a sticky IP that stays the same for a while. Bulk page loads are happier on rotating IPs. Sticky vs rotating proxies explains which to pick.
On Windows too? The same ideas apply, with different menus. Here's how to set a proxy on Windows 11.
So, what's the one thing to get right?
Set the proxy on the connection you're actually using.
Turn on both the HTTP and HTTPS web proxy. Check the green dot in Network settings, and test with an IP checker instead of trusting the panel. Those three habits fix nearly every Mac proxy problem we hear about.
Still need a proxy that's worth configuring? Compare the providers in our proxy directory and pick the type that fits your target.
Then it's five minutes in System Settings.
Frequently asked questions
Open System Settings, click Network, choose your active connection, click Details, then Proxies. Turn on Web proxy and Secure web proxy, enter the host and port, and click OK.
Usually the proxy is set on a different network service than the one you're using, or only the HTTP proxy is on. Set it on the connection with the green dot and enable Secure web proxy too.
No, most command-line tools ignore the macOS proxy settings. Set the HTTP_PROXY and HTTPS_PROXY environment variables, or pass the proxy directly to the tool, such as curl's -x flag.
Yes. Turn on SOCKS proxy in the Proxies panel and enter the host and port from your provider. Leave the web proxy switches off so you know which route your traffic takes.
macOS saves proxy credentials in your Keychain once you enter them in the Proxies panel. Some apps still ask once for the login the first time they use the proxy.
Go back to System Settings, Network, your connection, Details, Proxies, and switch off every proxy type you enabled. In Terminal, networksetup -setwebproxystate "Wi-Fi" off does the same for the HTTP proxy.